What You Need:
- 4’x 6’ piece of plywood (cut to size at your local home improvement store)
- 5 pieces of 1×4 lumber
- 4 pieces of 2×4 lumber
- A 1” thick pine board cut to 16” x 9”
- Plastic bucket
- Leak seal caulking
- 2 x ¼” wood screws
- 1” wood screws
- 8” long metal chain
- 3 red plastic frisbees
- 1 wall hook
- 3 x 3” metal hinges
- Construction adhesive
- Clamps
- Exterior primer and paint
- Electric drill
- Mitre saw
- Paint brushes and rollers
Instructions:
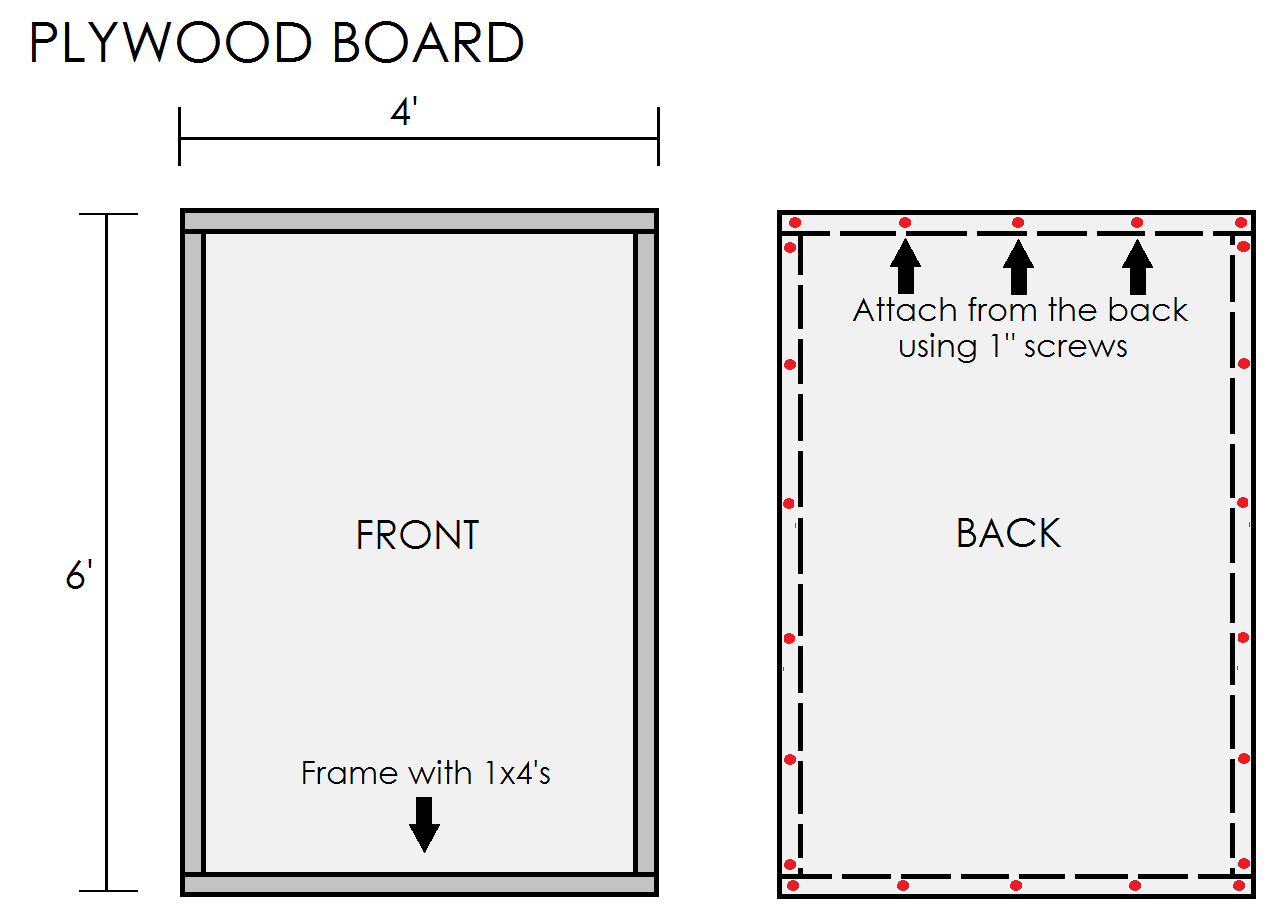
Building the plywood backdrop
- Cut the 1×4 boards to create a frame around the parameter of the plywood (2 boards cut to 48” and 2 boards cut to 65 ¼”).
- Apply construction adhesive to one side of each 1×4, clamp in place, and screw from the back to secure using 1” wood screws.
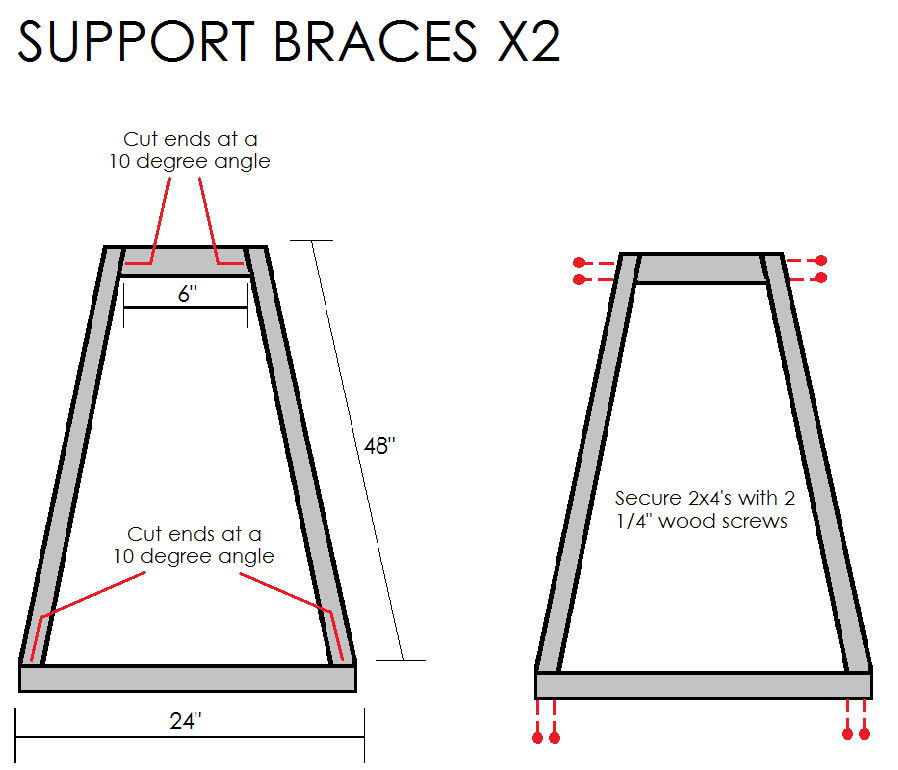
Building the two support braces
- Using 2×4 lumber, cut 4 pieces to 48” long with a 10-degree mitre at one end.
- Cut 2 pieces to 6” long with an inward angle of 10-degrees on both ends.
- Cut 2 pieces to 24” long with a straight chop cut at each end (See below for diagram).
- Using 2 ¼” wood screws, assemble 2 slanted wood braces.
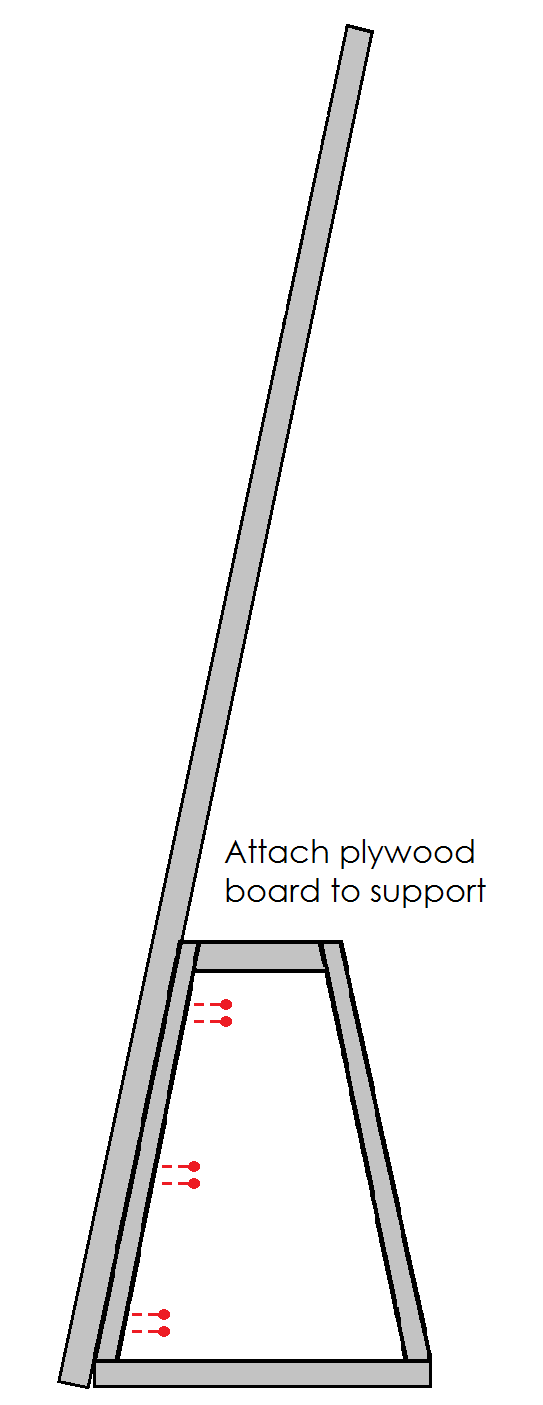
- Attach the plywood board to the back braces by screwing through each brace and into the back of the board frame (ie. through the 2×4 and through the plywood to secure into the 1×4 frame on the front)
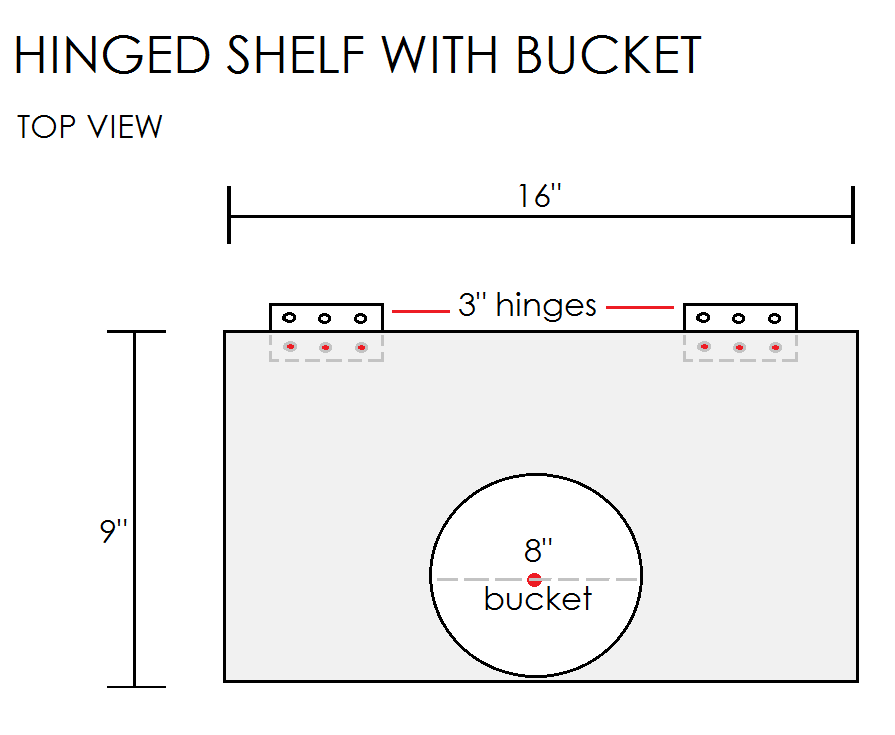
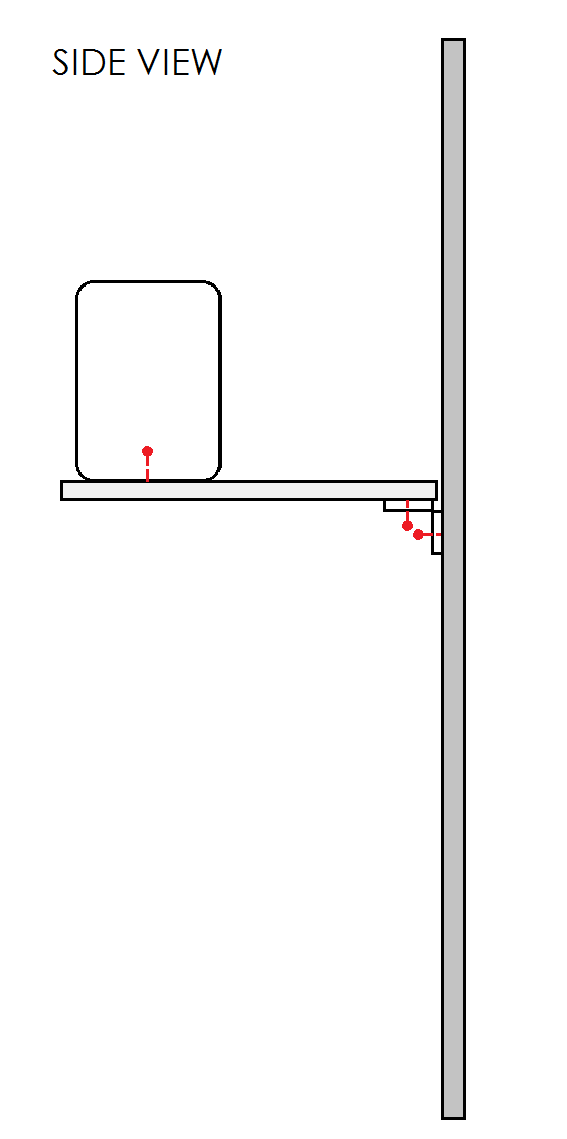
Building the hinged bucket shelf
- Using a 1” thick pine board cut to 16” x 9”, attach two 3” hinges to one of the long ends of the board.
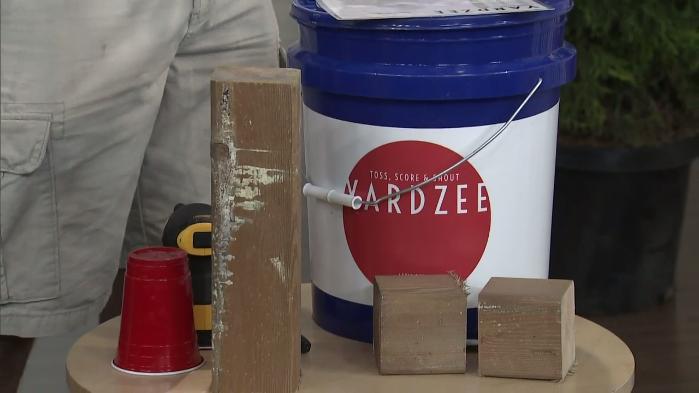
- With a small drill bit, drill a pilot hole in the bottom of the plastic bucket.
- Apply a generous amount of waterproof leak seal caulking around the drill hole on the bottom of the bucket, and then place the bucket on the wood board (See diagram for approximate placement).
- Attach the bucket to the board by drilling a 1” screw through the previously drilled pilot hole.
- Once the leak sealant dries, it will prevent water from draining out the screw hole.
Building the target
- Cut a piece of 2×4 to 48” long, and a second to 17” long.
- Lay the pieces out in a “T” with the short piece vertically in the middle, and drill 2 ¼” wood screws through the back of the short piece to attach to the longer piece.
- Attach a 3” metal hinge to the bottom of the 17” short piece of wood.
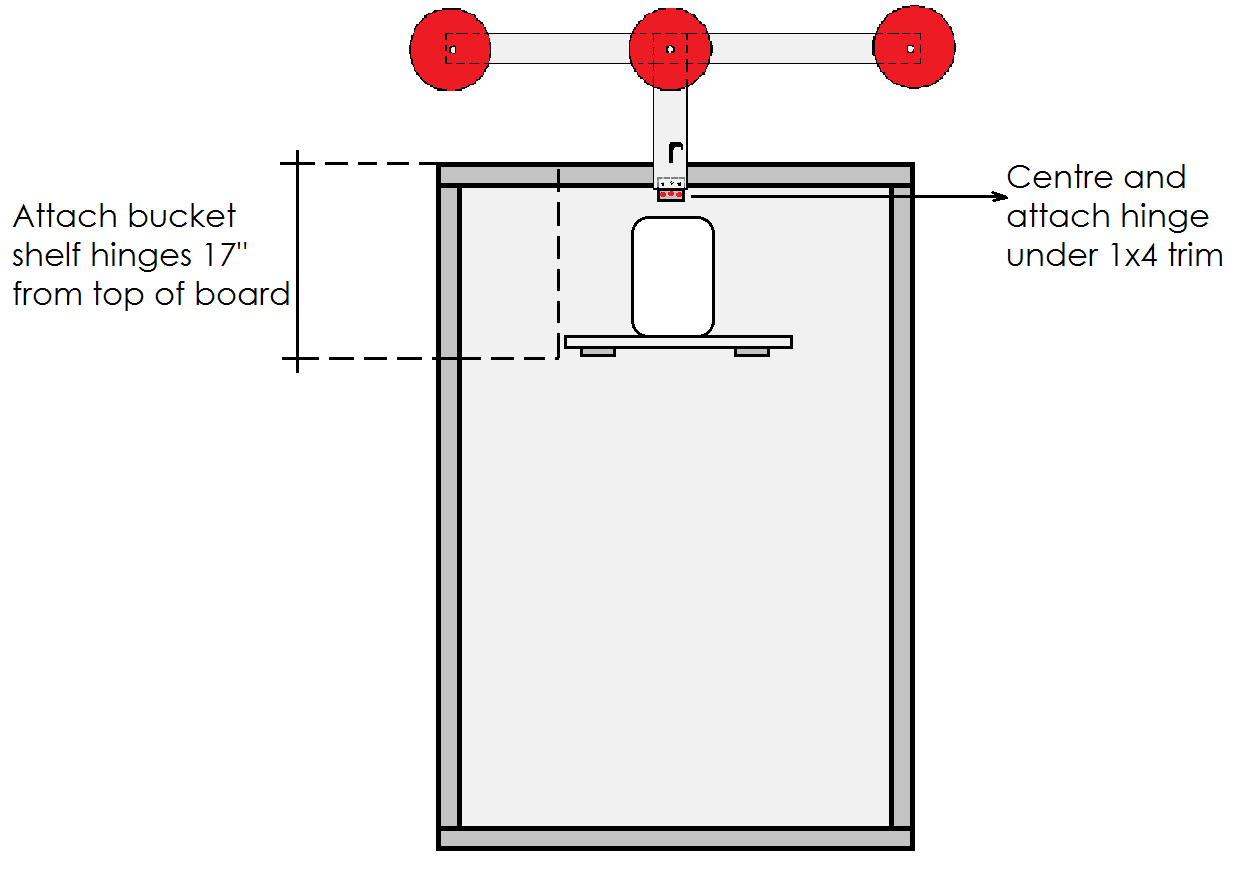
- Pre-drill pilot holes into the centre of three red plastic Frisbees.
- Attach each of the frisbees with a 1” wood screw onto the long 48” piece of 2×4 lumber.
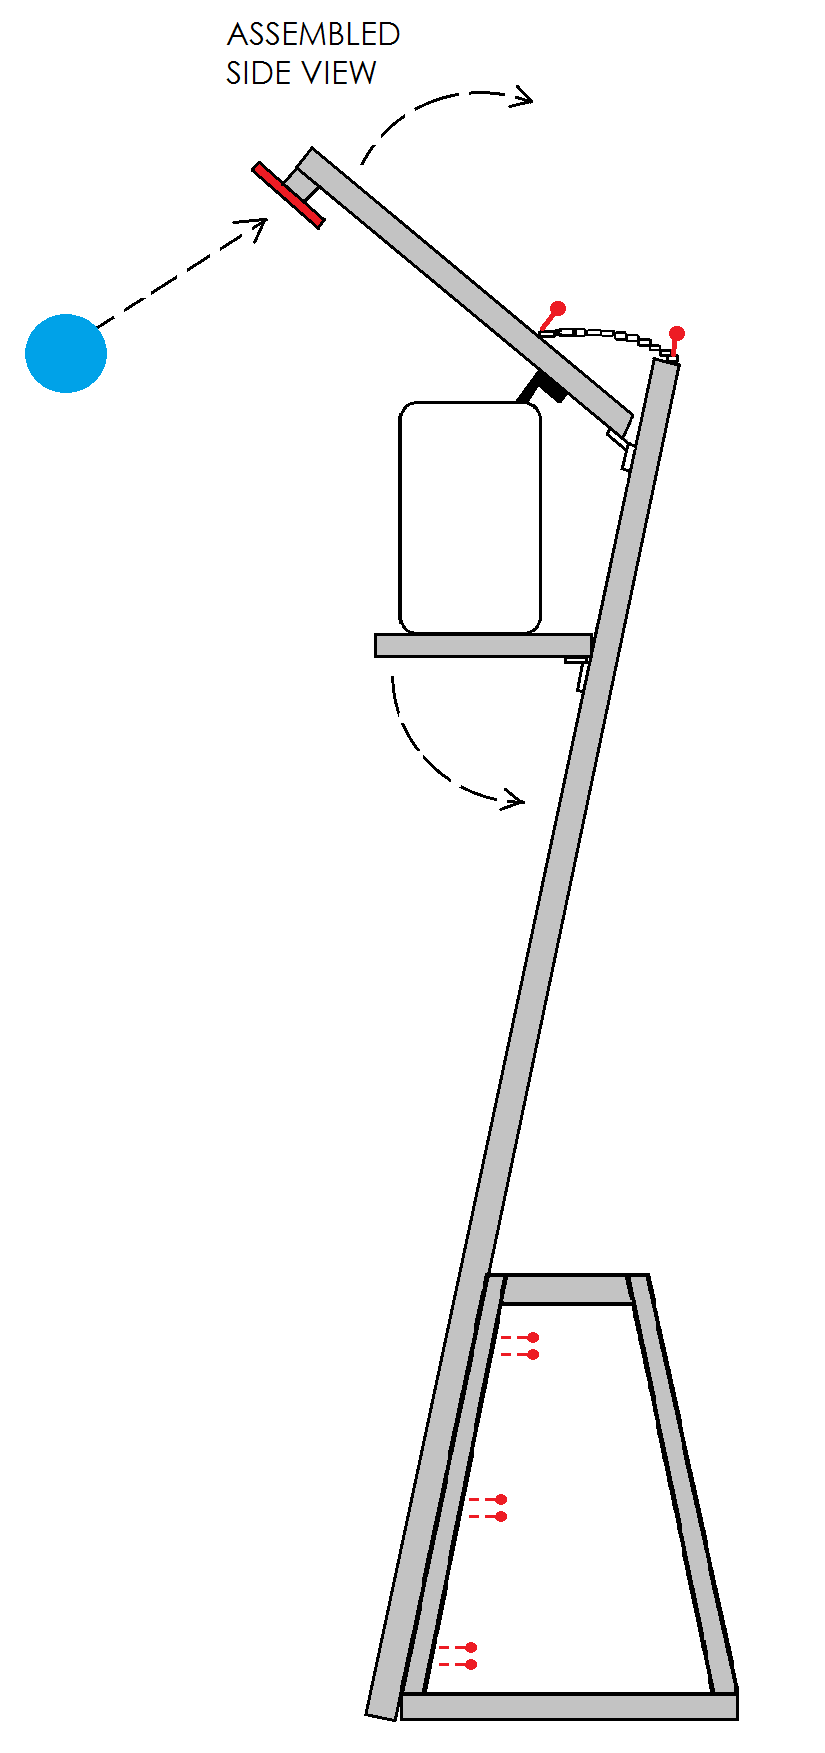
- Attach a wall hook with the hook pointing down (ie. upside down) approximately 3 ½” from the bottom edge of the 17” piece of 2×4.

Assembling
- Attach the target by centering the 3” metal hinge under the plywood frame and using 2 ¼” screws through the hinge holes and into the plywood (IMPORTANT: For added support, place a 4” long piece of 2×4 behind the plywood and screw the hinge screws through it to act as extra blocking support).
- Next, attach the bucket shelf approximately 17” from the top of the plywood frame, ensuring it’s centred (IMPORTANT: For added support, add an 18” piece of 2×4 behind the plywood and screw the hinge screws through it to act as extra blocking support).
- Using 8” metal chain, screw one end to the back of the target arm, and screw the other end to the top of the plywood frame. Adjust accordingly to ensure the hook holds the bucket in place before the targets are hit to release it.
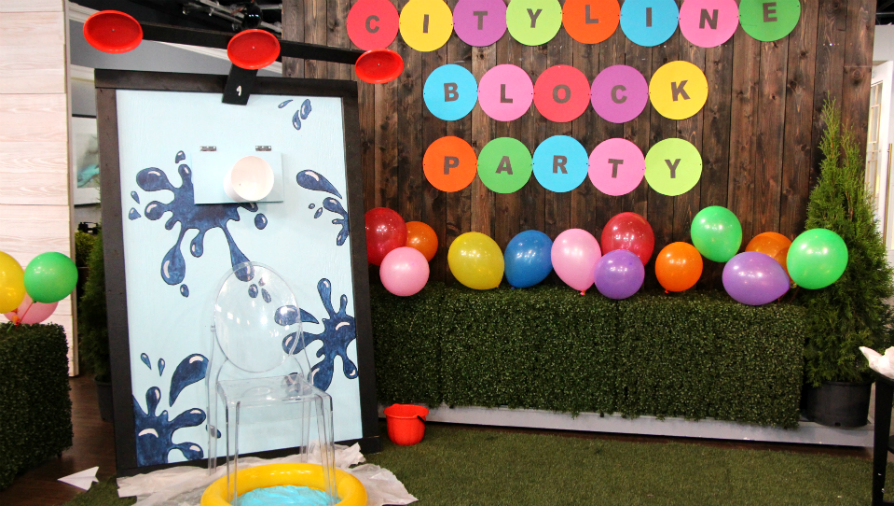
- Finally, prime with an exterior primer, and paint with exterior paint that can endure the outdoors and exposure to water. Splish splash, and enjoy!