
Farmers markets are bursting with local produce – baskets of ruby red strawberries, raspberries, and cherries, among other delights – and if you haven’t tried your hand at preserving before, now’s the perfect time.
It’s surprisingly easy to turn fresh fruit and vegetables into preserves, jams, and salsas – but depending on the recipe it can take a few hours, so this is a project for a weekend afternoon. Here are some simple rules for how to make dynamite preserves at home – you may never go back to store-bought again!
Step one: Hit up your local farmers market on a Saturday or Sunday morning and buy whatever looks good. If you’re shopping in late June, early July, red berries are a good option. Later in summer, you’ll find corn, tomatoes, apricots, and peaches. Consider buying a flat of berries, or a basket or two of peaches or apricots. You’ll be surprised at how much they cook down. Plus, you want to be able to give away a jar or two of your fresh-made preserves to friends and family!
Step two: Make sure you have all the canning equipment you need. That includes Mason jars with lids and rings (I like the 250mL size for jams and salsas, but buy the 500mL or larger if you’re making pickles, preserved peaches, or something that takes up more room), a canner*, tongs, and a large Pyrex measuring cup (handy for pouring cooked preserves into jars).
Step three: Wash and prepare your fruit, and get your other ingredients measured out and ready. Proceed with your chosen recipe. If you’re making jam, be sure to skim any foam that collects on the top – it’s not essential but it’ll give you a clearer overall product. Your jam might be slightly cloudy if you don’t.
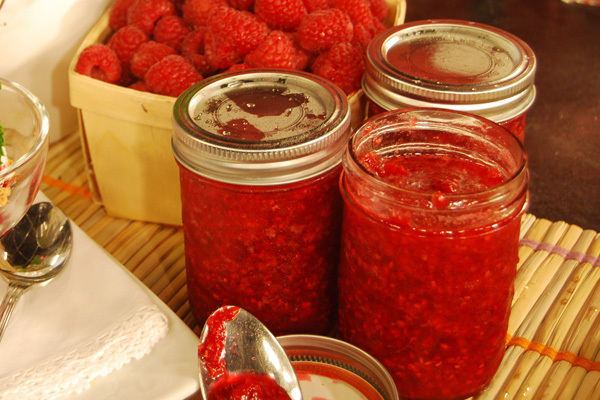
Step four: Pour your preserves into your prepared jars, leaving the recommended amount of headspace the recipe suggests (generally it’s about ¼ inch to ½ inch). Using tongs, center the lids over the jars, making sure that the jar rims are clean and dry. Then twist on the rings to fingertip tight.
Step five: Check to ensure your jars have sealed properly. You’ll be able to hear a popping sound as the jars seal – this can take anywhere from 15 minutes to a few hours. You’ll know the jars have sealed because the lid won’t bounce back when you press on the top of it. If the lid hasn’t sealed properly after 24 hours, refrigerate it and use the contents promptly.
Step six: Store your jars in a cool dark place until you’re ready to enjoy them. Which, trust us, you will!
Here are a few of our favourite recipes for preserves from Cityline.ca:
Strawberry, rhubarb and basil jam
*I sterilize my jars without using a canner. I run them through the dishwasher at the highest heat setting, then transfer them hot from the dishwasher to a preheated 300-degree oven to keep them warm until they’re ready to be filled. I heat the sealing lids and rings in boiling water before fastening them to the filled jars. This method has worked for me the past few years, but if you’re more comfortable buying a canner, please do so.
What’s your favourite thing to preserve in the summer? Share your picks in the comments below!