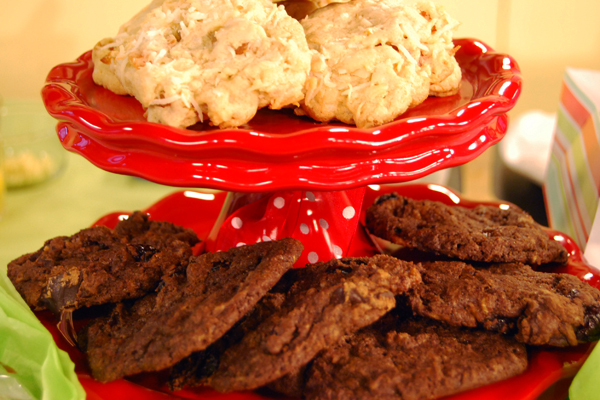

Crisp on the outside, soft and chewy in the middle—and downright gooey if you get to them still warm. These cookies are great for picnics and crowds, and the dough can be frozen until you need it. The contrasting flavours and textures: rich, dark chocolate; sweet, crunchy toffee; and chewy, tangy sour cherries, make these totally addictive—and a step up from the average chocolate cookie.
Regan Daley likes to make these pretty much fist-sized, but you can make them smaller if you wish. (Don’t fool yourself; it just means you’ll eat more of them.) Remember to adjust the baking time accordingly if you reduce the size of the cookies.
Chocolate Fudge Cookies with Toffee and Dried Cherries
Makes 40 large cookies
Ingredients:
2 1/4 cups all-purpose flour
1/2 cup unsweetened Dutch-process cocoa powder
1 teaspoon baking soda
1/4 teaspoon salt
1 cup unsalted butter, at room temperature
1 cup tightly packed dark brown sugar
3/4 cup granulated sugar
2 large eggs
1 1/2 teaspoons pure vanilla extract
1 cup plump, moist, dried sour cherries (Make sure the cherries are plump and soft, not dry and hard)
8 ounces bittersweet or semisweet chocolate, chopped into chunks about the size of the cherries
1 cup English toffee pieces for baking, such as Skor Bits
Method:
Preheat the oven to 350°. Line two heavy baking sheets, not non-stick, with parchment paper and set aside. Sift the flour, cocoa, baking soda and salt together into a bowl and set aside.
In a large mixing bowl, or the bowl of an electric or stand mixer fitted with the paddle attachment, cream together the butter and both sugars until light in colour and fluffy, about 3 minutes. Add the eggs, one at a time, beating well after each addition and scraping down the sides of the bowl. Beat in the vanilla. Stir in the flour-mixture in three additions, blending just until the dry ingredients are moistened. (I find this part of the job easier with a wooden spoon, rather than the mixer, as I can see better which parts of the batter need more attention without over-mixing.)
Stir in the chunky ingredients and mix until they seem evenly distributed. (The dough may be frozen at this point for up to 4 months: wrap the dough securely in plastic wrap, then in a plastic freezer bag. Thaw the dough in the refrigerator without removing its wrapping before portioning the cookies and baking.)
Drop the batter by heaping tablespoons onto the prepared baking sheets and place them in the centre of the oven. If you have a large and evenly tempered oven, place the two sheets in at once, on two racks positioned close to the middle of the oven. Switch the position of the trays once during baking. If your oven is small, or tends to have hot and cold spots, bake one tray at a time so the cookies will bake evenly.
Bake the cookies for 15 to 18 minutes, or until barely set in the centre and just firm around the edges. Rotate the sheets once or twice. Cool the cookies on the tray for 3 to 5 minutes, then transfer to a wire rack to cool completely before storing. (Feel free to eat them at any point!)
Run the hot tray under cold water to cool it, dry thoroughly and repeat with the remaining dough.
Store the cookies in airtight containers, layered between sheets of parchment or waxed paper, for up to 5 days.
Variation: Chocolate Fudge Brownies with Toffee and Dried Cherries
Preheat the oven to 350°. Grease a 9 x 13-inch baking dish and line the bottom and up the two long sides with a sheet of parchment paper, letting it hang over the two long sides by an inch or so.
Follow the same recipe as above, substituting an equal amount of cake-and-pastry flour (not self-rising) for the all-purpose flour. (This dough may be frozen and thawed in the same fashion as the cookie dough above.)
Spread the finished batter evenly into the pan and bake in the centre of the oven for 50 to 60 minutes, or until the top is shiny and a wooden skewer inserted about 2 inches away from the centre of the brownies comes out with crumbs clinging to it. (Test in another spot if your skewer happens to hit a chocolate chunk.)
Cool the brownies completely in the pan set on a wire rack. Run a thin-bladed knife around the edges of the pan and use the overhang of paper to lift the whole cake out. Cut into squares and serve or store in an airtight container up to 5 days.
Makes 20 to 24 brownies.
Courtesy of Regan Daley
Chef/Author of ‘In The Sweet Kitchen’
(416) 406-1506
www.regandaley.com